CUDA-and-pytorch
1. 在win系统上安装pytorch
1.1. Step 1 安装Conda
Anaconda和Miniconda都可以,前者东西全一些,后者更为轻便。
展示的是Anaconda
此处下载推荐使用魔法
如果网络不支持那就使用Index of /anaconda/archive/ | 清华大学开源软件镜像站 | Tsinghua Open Source Mirror
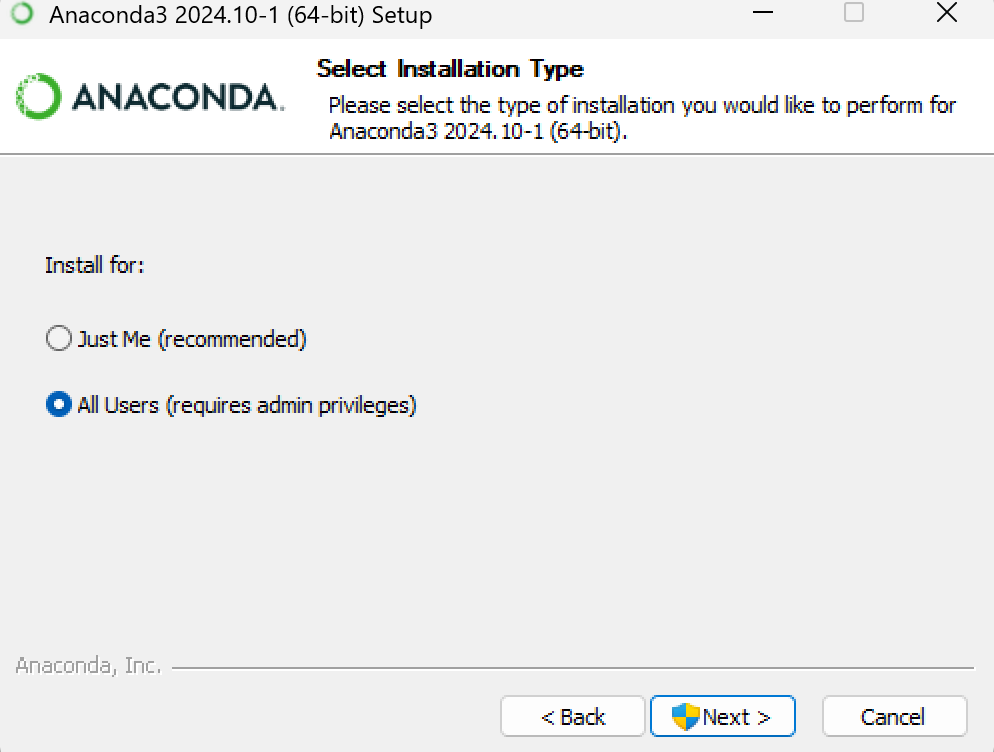
Anaconda3-2024.10-1-Windows-x86_64.exe下载好之后打开
如果不想配置环境变量就选All Users吧。
然后推荐找个不是C盘的地方下
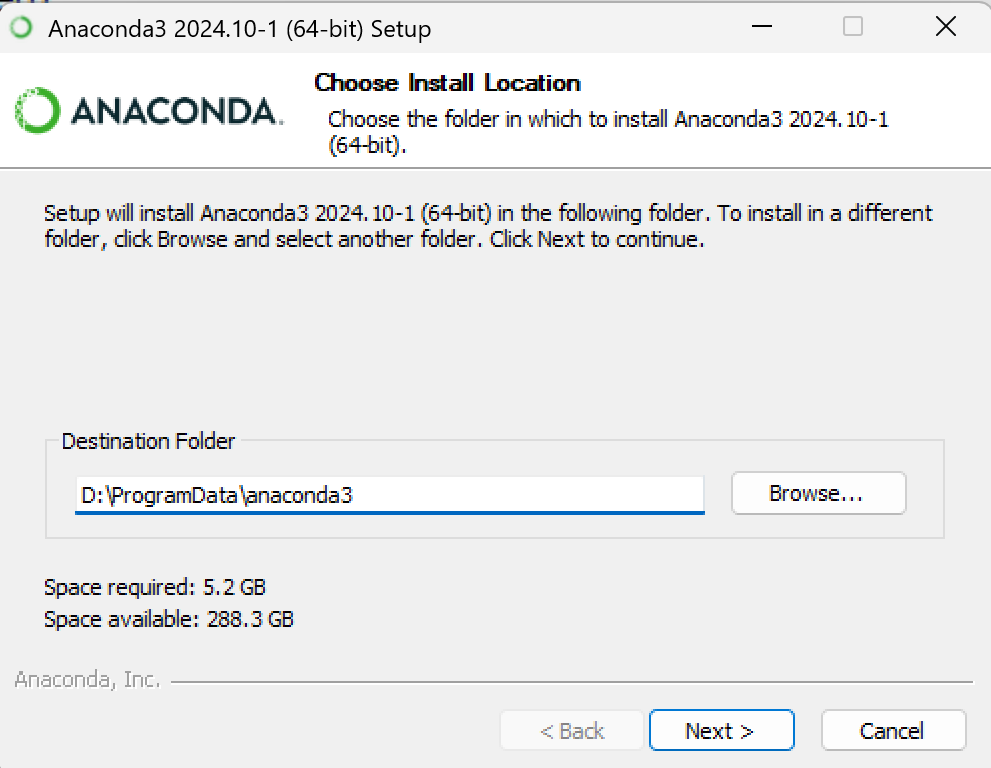
安装时间也许会比较长,别急。
装好之后可以测试一下conda --version,有这样的反应就好,版本不一定一样。1
2conda --version
conda 25.1.1
因为我后面要玩d2l,所以就用conda创建了一个环境
conda create -n d2l python=3.10
这边conda是指令头,-n 是指定新环境的名称,d2l 是你想要为新环境指定的名称,python=3.10这部分指定了python的版本,不过其实不一定要3.10,pytorch官网上提示的是Latest PyTorch requires Python 3.9 or later.,加上学长爱用3.10,那就定了。ps:3.10和3.9到底谁大呢
创建完成会提示的,后面需要激活一下
conda activate d2l
顺利的话就能看到(d2l)在输入的前面。
用的差不多之后要回到原来的环境的话就
conda deactivate
这样就回去了,不过你直接关掉重开也不是不行(
1.2. Step 2 CUDA
笔记本电脑的GPU是Nvidia 4060 laptop1
2
3
4
5
6
7
8
9
10
11
12
13
14>nvidia-smi
Wed Feb 19 00:07:11 2025
+-----------------------------------------------------------------------------------------+
| NVIDIA-SMI 571.96 Driver Version: 571.96 CUDA Version: 12.8 |
|-----------------------------------------+------------------------+----------------------+
| GPU Name Driver-Model | Bus-Id Disp.A | Volatile Uncorr. ECC |
| Fan Temp Perf Pwr:Usage/Cap | Memory-Usage | GPU-Util Compute M. |
| | | MIG M. |
|=========================================+========================+======================|
| 0 NVIDIA GeForce RTX 4060 ... WDDM | 00000000:01:00.0 On | N/A |
| N/A 39C P8 3W / 115W | 1533MiB / 8188MiB | 0% Default |
| | | N/A |
+-----------------------------------------+------------------------+----------------------+
这边可以看到CUDA的版本
到https://developer.nvidia.com/cuda-downloads里面去
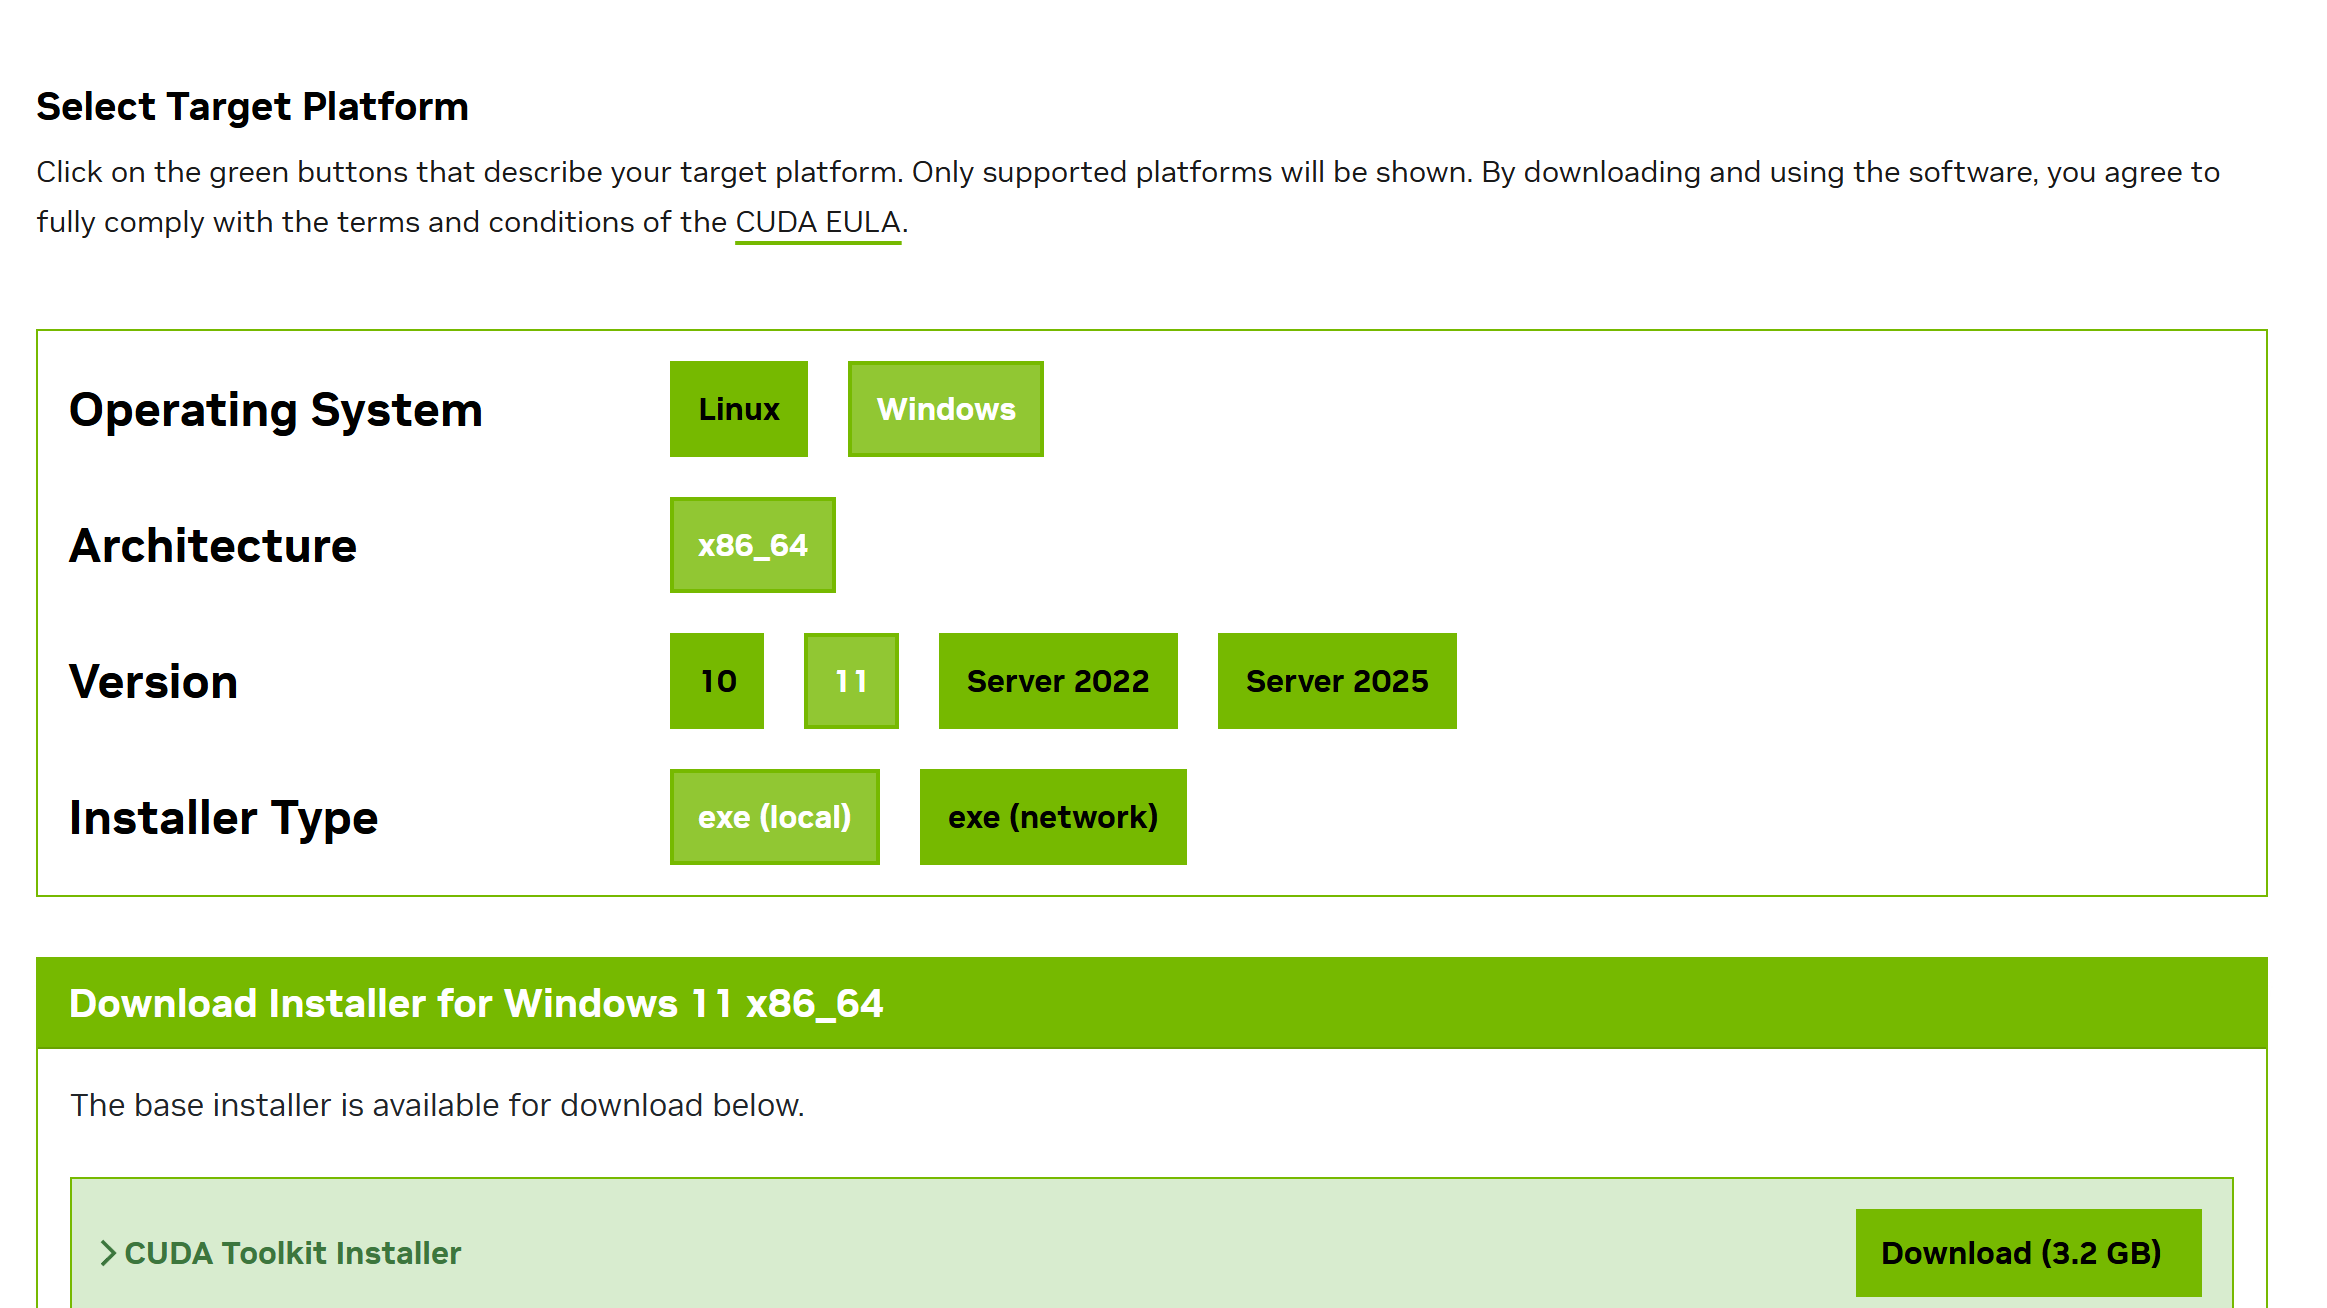
然后根据版本选一下,本地跑别乱选network
然后点Download就行了
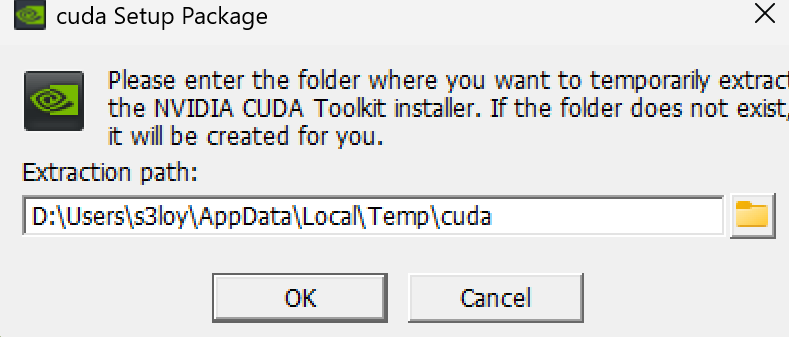
下载好的ok就行了,这步只是解压不是安装。
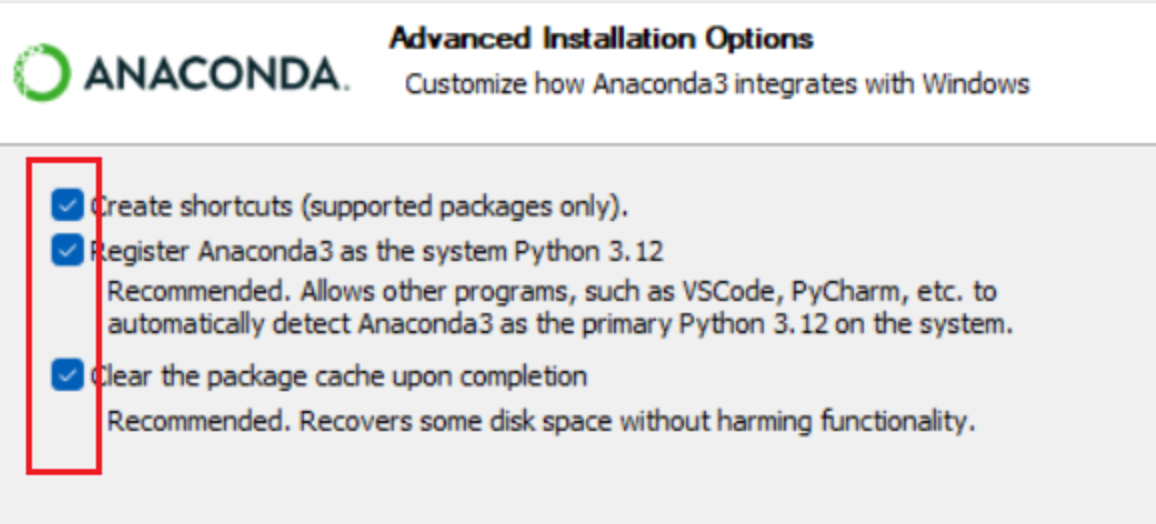
网上看教程说
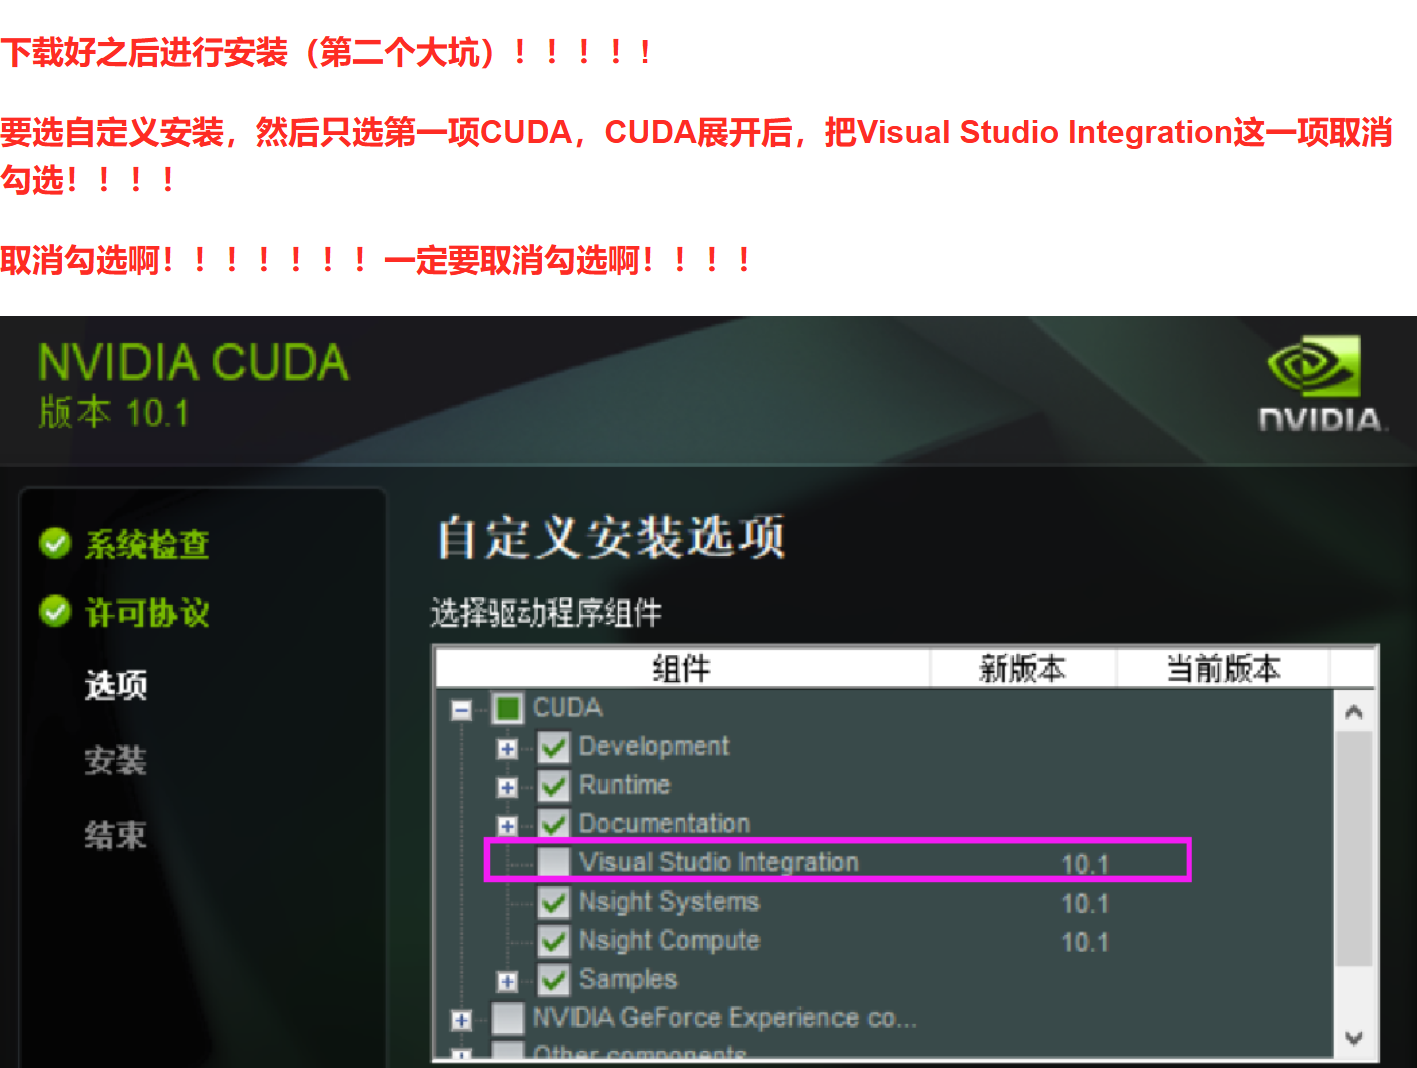
我确实没勾这个,但是我下面的几个选项还是都装了。
安装好之后理论上环境变量是在的,可以先验证一下
在C:\Program Files\NVIDIA GPU Computing Toolkit\CUDA\v12.8 (你安装的位置,默认是这样)打开终端
按顺序输入
cd .\extras\demo_suite
.\bandwidthTest.exe
.\deviceQuery.exe
回车测试1
2
3
4
5
6
7
8
9
10
11
12
13
14
15
16
17
18
19
20
21
22
23
24
25
26
27
28
29
30
31
32
33
34
35
36
37
38
39
40
41
42
43
44
45
46
47
48
49
50
51
52
53
54
55
56
57
58
59
60
61
62
63
64
65
66
67
68
69
70
71
72
73
74# cd .\extras\demo_suite
# .\bandwidthTest.exe
[CUDA Bandwidth Test] - Starting...
Running on...
Device 0: NVIDIA GeForce RTX 4060 Laptop GPU
Quick Mode
Host to Device Bandwidth, 1 Device(s)
PINNED Memory Transfers
Transfer Size (Bytes) Bandwidth(MB/s)
33554432 12883.8
Device to Host Bandwidth, 1 Device(s)
PINNED Memory Transfers
Transfer Size (Bytes) Bandwidth(MB/s)
33554432 12835.4
Device to Device Bandwidth, 1 Device(s)
PINNED Memory Transfers
Transfer Size (Bytes) Bandwidth(MB/s)
33554432 196311.5
Result = PASS
NOTE: The CUDA Samples are not meant for performance measurements. Results may vary when GPU Boost is enabled.
# .\deviceQuery.exe
C:\Program Files\NVIDIA GPU Computing Toolkit\CUDA\v12.8\extras\demo_suite\deviceQuery.exe Starting...
CUDA Device Query (Runtime API)
Detected 1 CUDA Capable device(s)
Device 0: "NVIDIA GeForce RTX 4060 Laptop GPU"
CUDA Driver Version / Runtime Version 12.8 / 12.8
CUDA Capability Major/Minor version number: 8.9
Total amount of global memory: 8188 MBytes (8585216000 bytes)
MapSMtoCores for SM 8.9 is undefined. Default to use 128 Cores/SM
MapSMtoCores for SM 8.9 is undefined. Default to use 128 Cores/SM
(24) Multiprocessors, (128) CUDA Cores/MP: 3072 CUDA Cores
GPU Max Clock rate: 2370 MHz (2.37 GHz)
Memory Clock rate: 8001 Mhz
Memory Bus Width: 128-bit
L2 Cache Size: 33554432 bytes
Maximum Texture Dimension Size (x,y,z) 1D=(131072), 2D=(131072, 65536), 3D=(16384, 16384, 16384)
Maximum Layered 1D Texture Size, (num) layers 1D=(32768), 2048 layers
Maximum Layered 2D Texture Size, (num) layers 2D=(32768, 32768), 2048 layers
Total amount of constant memory: zu bytes
Total amount of shared memory per block: zu bytes
Total number of registers available per block: 65536
Warp size: 32
Maximum number of threads per multiprocessor: 1536
Maximum number of threads per block: 1024
Max dimension size of a thread block (x,y,z): (1024, 1024, 64)
Max dimension size of a grid size (x,y,z): (2147483647, 65535, 65535)
Maximum memory pitch: zu bytes
Texture alignment: zu bytes
Concurrent copy and kernel execution: Yes with 1 copy engine(s)
Run time limit on kernels: Yes
Integrated GPU sharing Host Memory: No
Support host page-locked memory mapping: Yes
Alignment requirement for Surfaces: Yes
Device has ECC support: Disabled
CUDA Device Driver Mode (TCC or WDDM): WDDM (Windows Display Driver Model)
Device supports Unified Addressing (UVA): Yes
Device supports Compute Preemption: Yes
Supports Cooperative Kernel Launch: Yes
Supports MultiDevice Co-op Kernel Launch: No
Device PCI Domain ID / Bus ID / location ID: 0 / 1 / 0
Compute Mode:
< Default (multiple host threads can use ::cudaSetDevice() with device simultaneously) >
deviceQuery, CUDA Driver = CUDART, CUDA Driver Version = 12.8, CUDA Runtime Version = 12.8, NumDevs = 1, Device0 = NVIDIA GeForce RTX 4060 Laptop GPU
Result = PASS
如果有这样的就说明成功了
试一下nvcc -V

1.3. Step 3 安装Pytorch
这个安装靠的是conda虚拟环境下的pip3安装的完整pytorch,并没有使用docker镜像来部署,不过如果到了需要租显卡的时候,就需要再去学习使用docker来部署了。
先conda activate d2l 激活一下自己的环境 别笨到自己环境名字都没改,当然你也叫d2l那我没意见
PyTorch打开这个网站,
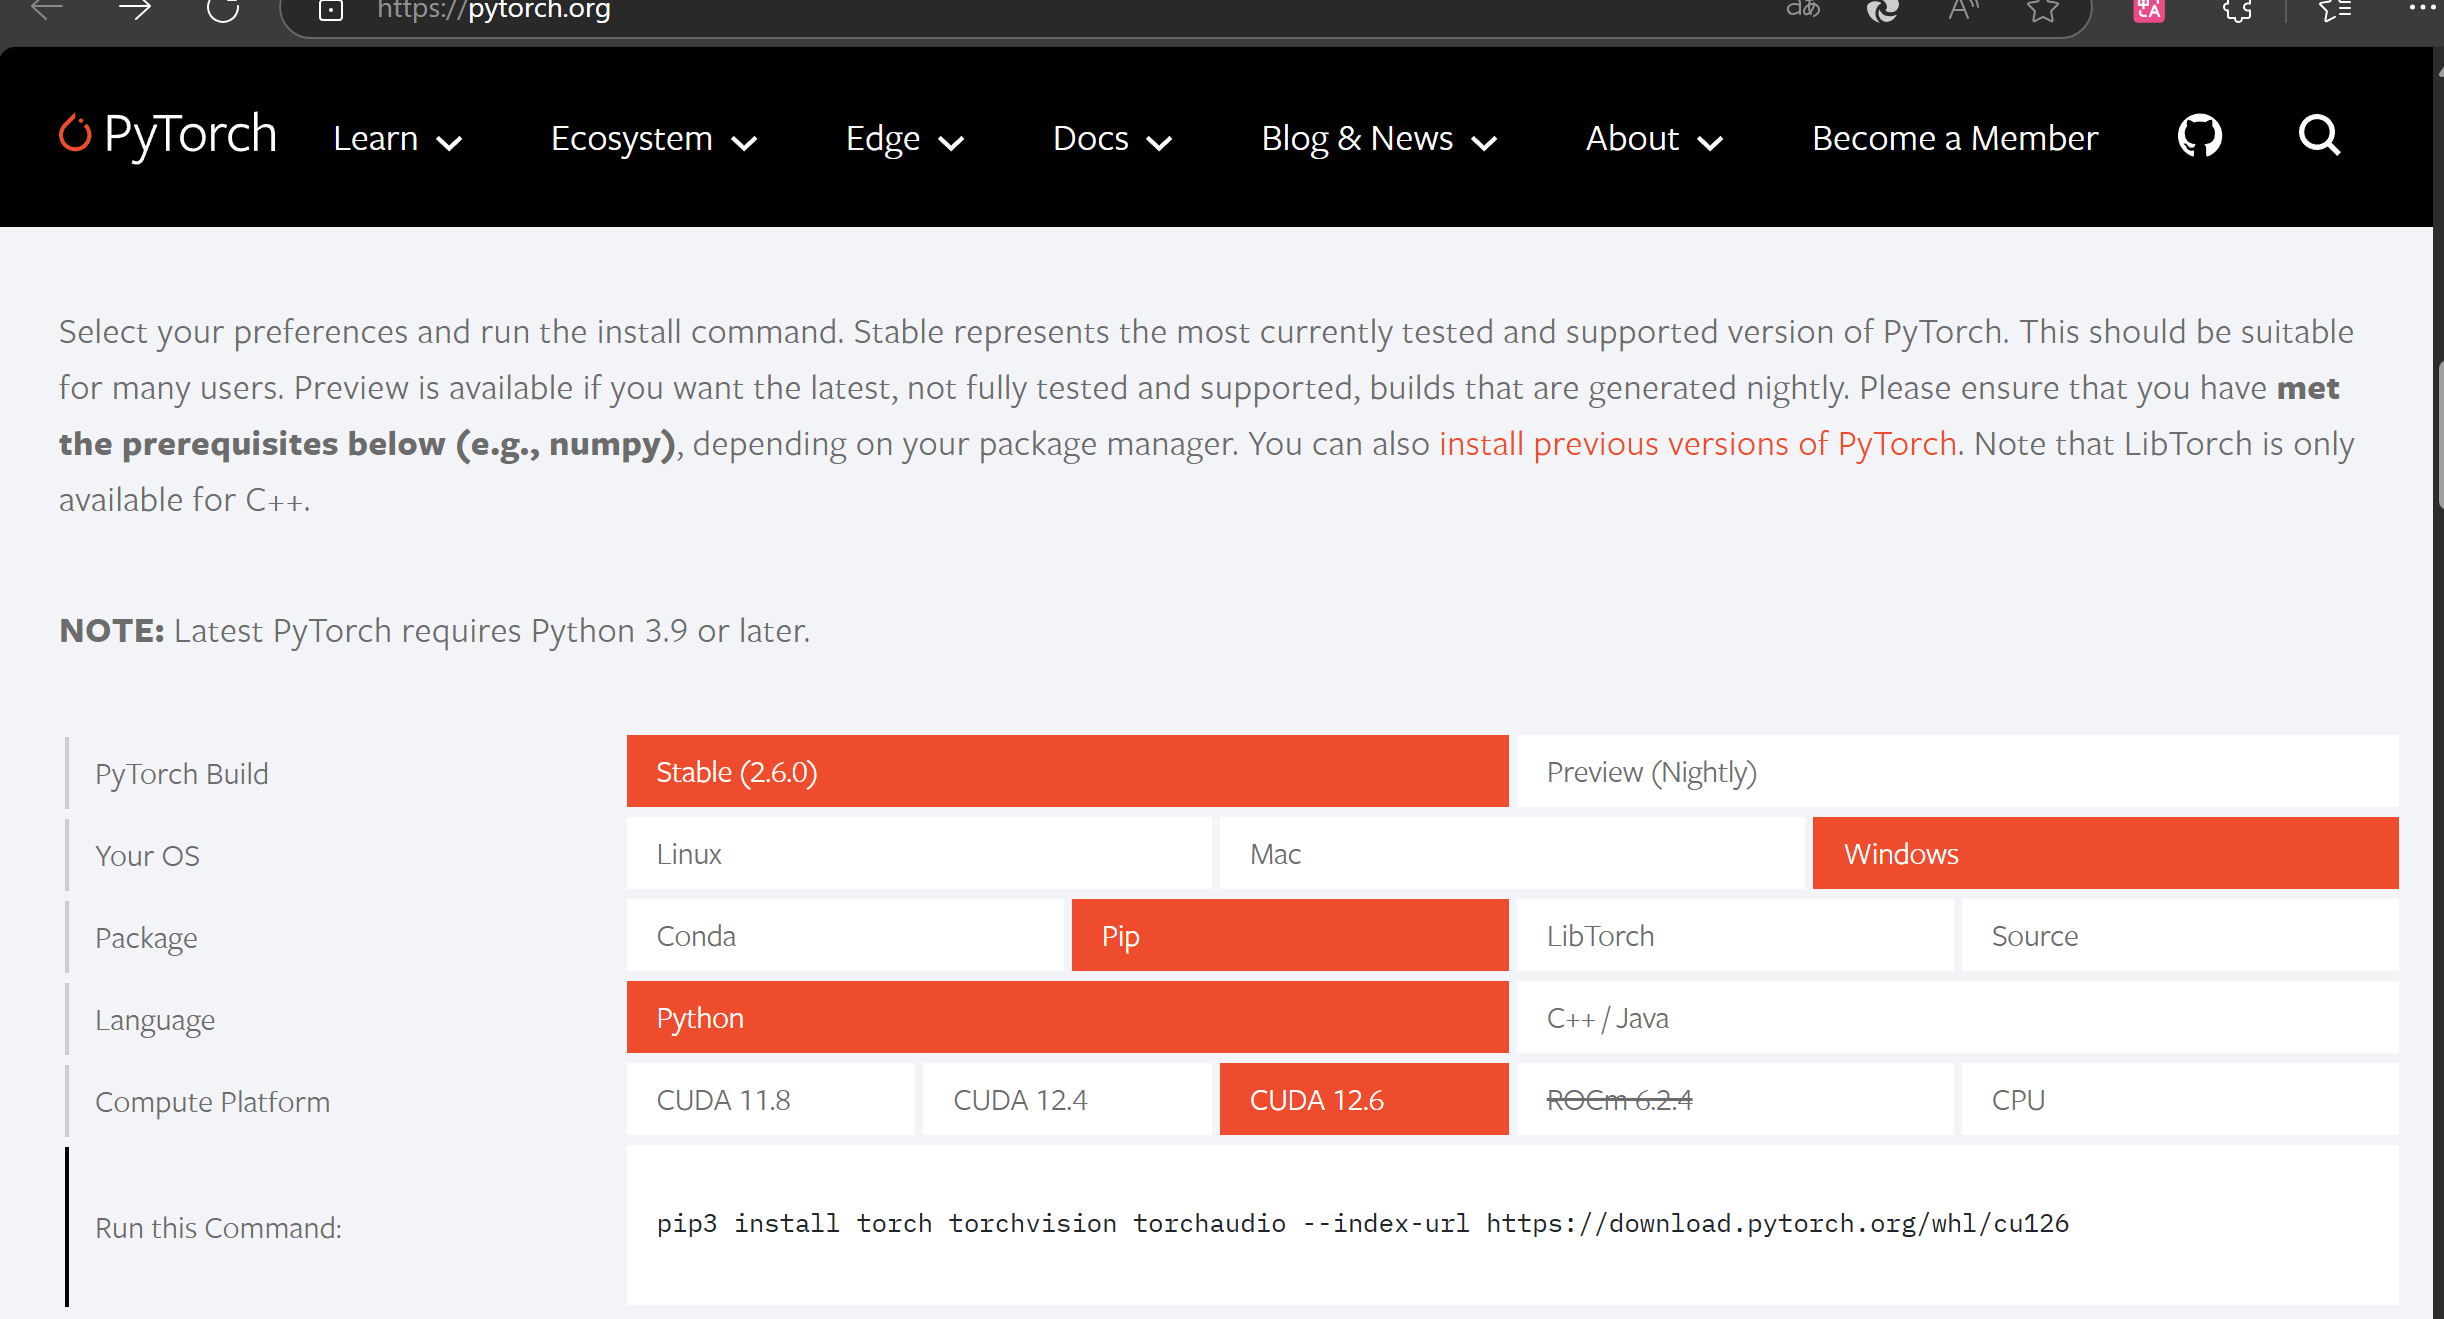
选好要下载的,复制好下面这个Run this Command
到前面准备好的conda环境去安装
需要魔法,否则可能会给你装疯,而且在查阅资料的时候发现用镜像有概率不能识别pytorch,即使你的pytorch是你的pytorch,但是你的pytorch不是你的pytorch
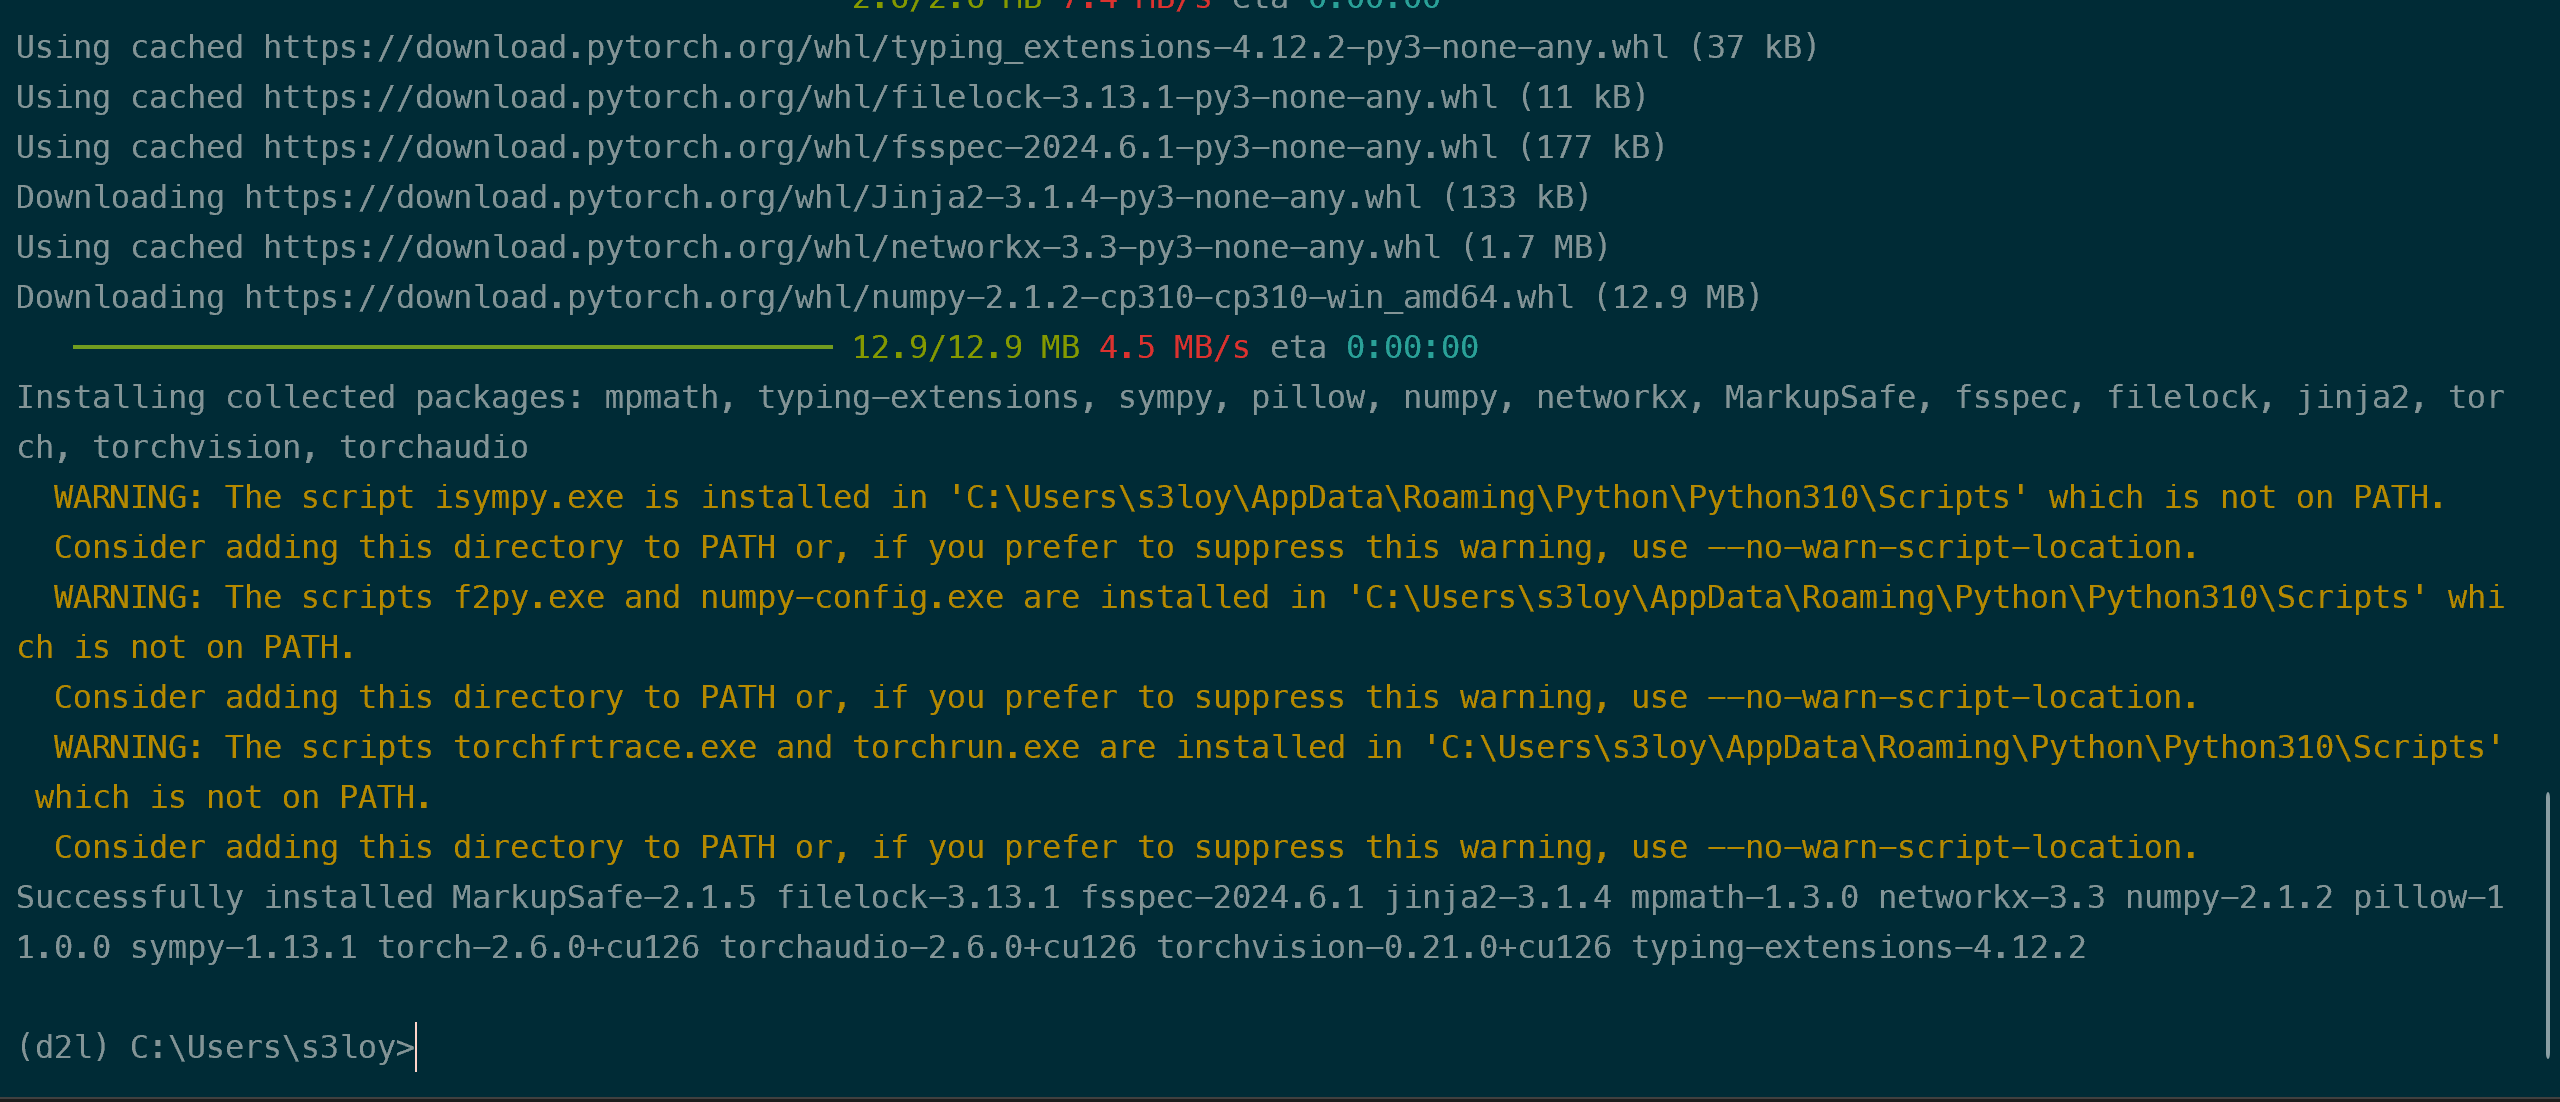
报警告不用慌张,不影响使用。如果是这样就安装好了。
下面就测试一下pytorch的使用情况
python
>>> import torch
第一次应该会等很久,别乱动就是了
>>> torch.cuda.is_available()
返回true
>>> import torch
>>> torch.cuda.device_count()
返回1
代表识别到一张显卡
大概就活了。

exit()退出去
简单的pytorch就装好了